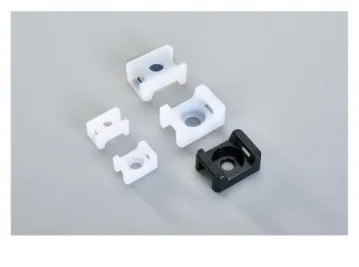
A cable tie holds the bundle. The mount decides whether the assembly is still there next year. Vibration, heat, gravity and the surface you are fixing to will all attack the mounting point long before the strap reaches its tensile rating — which is why the choice between a screw-mount saddle, an adhesive base and a push-mount tie matters more than the tie itself. This guide compares the four mainstream fixing methods on strength, surface requirements and installation rules, so you can specify the right one the first time.
Why the Mount, Not the Tie, Is Usually the Weak Link
Take a 50 lb tie. That number describes the loop tensile strength of the strap and head — measured on a test loop, in a laboratory. In service, the load path runs further: strap → tie head → mount slot → fixing point → panel. Every joint in that chain can fail independently of the tie's rating. A 50 lb tie on an adhesive base loaded with a heavy copper bundle is not a 50 lb installation; it is an adhesive bond under load, and that is a much smaller number.
So the question is never "how strong is the tie". It is: what is the load, in which direction, on what surface, in what environment — and which fixing method answers that combination.
The Four Fixing Methods at a Glance
| Method | Installation | Pull-out strength | Surface requirement | Removable | Best for |
|---|---|---|---|---|---|
| Screw-mount saddle base | Drill and drive screw | Highest (mechanical thread) | Any — metal, concrete, wood, rough | Yes, unscrew | Heavy bundles, vibration, outdoor, permanent runs |
| Adhesive-backed base | Peel and stick | Lowest (bond-limited) | Smooth, clean, non-porous, indoor | No (destructive) | Fast, tidy routing where drilling is not possible |
| Push-mount tie | Press into pre-drilled hole | Good (barb-dependent) | Panels with a correct-size hole | Difficult, often destructive | High-volume assembly, plastic and sheet-metal panels |
| Edge clip / snap-in | Clip onto edge or rail | Medium to high | Panel edges, DIN rail | Yes | Control cabinets, trays, rack edges |
Matching the Base Slot to the Tie Width
This is the most common specification mistake, and it is a pure dimensional issue: a saddle base accepts a specific range of tie widths. Thread an oversized tie and it will not pass through the slot; use a much narrower tie and the saddle cannot grip the bundle evenly, so the strap cuts into the insulation instead of distributing the load.
Our saddle tie mounts are sized in two families for exactly this reason:
| Item No. | L (mm) | W (mm) | H (mm) | Screw hole D (mm) | Max. tie width |
|---|---|---|---|---|---|
| HS-STW-1-B / 1-C | 14.7 | 9.9 | 7.1 | 3.5 / 4.5 | 5.0 mm |
| HS-STW-2-B / 2-C | 21.7 | 15.8 | 9.5 | 5.3 / 6.3 | 9.0 mm |
The -B versions take a smaller screw; the -C versions have a larger screw hole for heavier fixings. Both are moulded from UL-approved Nylon 66, UL 94 V-2, rated -40°C to +85°C, in natural (white) and UV black. In practice: 1-series for standard and light-heavy ties, 2-series when the strap itself is 7.6 mm or 9.0 mm wide.
Push Mounts: Hole Size Determines Holding Force
Push-mount ties — also called arrowhead or fir-tree ties — snap into a pre-drilled or moulded hole, with no screw and no adhesive. Holding force is set by the barb geometry and the hole diameter, and it rises with tie size. Industry reference values look roughly like this:
| Tie width × bundle | Recommended hole dia. | Typical pull-out force | Common use |
|---|---|---|---|
| 3.6 mm × 50 mm | Ø 4.8 – 5.0 mm | ~35 N | Small wire bundles, appliances, electronics |
| 4.8 mm × 80 – 120 mm | Ø 6.0 – 6.3 mm | ~50 N | Appliance wiring, HVAC controls |
| 7.6 mm × 150 – 200 mm | Ø 7.8 – 8.0 mm | ~80 N | Automotive harnesses, industrial panels |
| 9.0 mm + × 200 mm + | Ø 9.5 – 10.0 mm | ~120 N | Heavy-duty harnesses, machinery |
Treat those as reference magnitudes rather than guarantees: actual values vary by manufacturer and by panel material. Plastic panels want a slightly undersized hole for an interference fit; sheet metal wants a clean, correctly sized hole or the barb will not seat. See our push mount cable ties for the fir-tree and arrowhead options we mould, and expand nails where a screw-free fixing into masonry is needed.
Adhesive Bases: The Preparation Rules Decide Everything
Adhesive-backed mounts are the most popular option by volume — and the most abused. The bond is only as good as the surface and the cure. Four rules make the difference between a base that lasts and one that peels in a season:
- Clean first. Wipe the surface with isopropyl alcohol or a degreaser and let it dry fully. Dust, oil and release agent are the main causes of adhesive failure.
- Do not touch the pad. Handle the base by its edges when removing the liner; skin oils degrade the adhesive.
- Press and hold. Apply firm, even pressure for around 30 seconds across the whole base.
- Wait before loading. Give the bond 15–30 minutes before fitting the tie — and ideally 24 hours for full cure strength on a critical run.
Then respect the limits: adhesive bases belong on smooth, non-porous, indoor surfaces under light-to-medium loads. Rough concrete, textured plaster, dusty cabinets and high-temperature zones will defeat the bond. For outdoor and UV-exposed work, specify a UV-stabilised product — standard nylon degrades under prolonged sun. Our self-adhesive tie mounts and self-adhesive cable clamps cover the indoor routing case; the adjustable version suits bundles that change size.
Screw Mounts: When to Spend the Extra Twenty Seconds
A screw-mount base costs one drill hole and one screw more than an adhesive pad, and it buys a mechanical fixing that does not care about heat, dust, humidity or vibration. Specify screw fixings when:
- The bundle is heavy — large copper or fibre runs that must not sag.
- Vibration is present: machinery, vehicles, plant equipment, marine and RV installations.
- The surface is rough or contaminated: concrete, unfinished metal, timber.
- The installation is outdoor or exposed, or must survive wash-down.
- The route may need to be re-positioned later — a screw comes out; a cured adhesive pad does not.
For the fixing point itself, our screw-on wire connectors and wire mounts cover related panel-fixing needs, while saddle mounting cable ties and mountable head cable ties integrate the base into the tie for high-volume assembly, where fitting a separate base would double the labour.
Specification Checklist
- Estimate the load, then double it. A safety factor of 1.5–2× on the expected static load absorbs vibration, thermal cycling and the fact that bundle weight is rarely uniform.
- Check the load direction. Shear and peel loads are not the same; a base loaded sideways is not being used as designed.
- Match the slot to the tie width — 5.0 mm or 9.0 mm on our saddle series.
- Confirm the environment: temperature range, UV exposure, chemical contact, indoor or outdoor.
- Choose the fixing to the surface, not the other way around. No holes allowed means adhesive; rough or vibrating means screw.
- Verify the polymer: Nylon 66 with UV stabilisation for anything exposed, and a declared temperature range that brackets your worst case.
Choosing the Fixing for Your Bundle
We mould saddle tie mounts, push mount ties, adhesive bases and the full cable clips and mounts range in our own tooling, in natural and UV black Nylon 66. As a cable tie and wire accessories manufacturer since 1997, we can also mould a base to your drawing if none of the standard sizes fits your panel.
Send us the panel material, hole or surface situation, bundle diameter and load estimate, and our engineers will recommend the specific base and tie width combination — then ship samples so you can test the fixing on your own assembly line. Request a quote and we will reply within 24 hours.